Getting started with myspec
Stop writing prompts and start building specs. Myspec is the AI agent that turns your vision into structured product requirement documents (PRDs). By asking the right questions, myspec helps you define clear goals and catch edge cases before you start building, ensuring your AI-generated website is exactly what you imagined.
MySpec Quick Start Guide: Mastering Spec-Driven Development
Welcome to MySpec! 👋 We are thrilled to see you here!
If you are reading this, you are likely familiar with the frustration of the "blank page problem" or the endless loop of correcting AI coding assistants (like Cursor, Claude Code, or GitHub Copilot) when they build the wrong thing.
MySpec acts as your AI Software Architect. Instead of repeatedly tweaking prompts to fix broken code, MySpec works with you upstream to transform messy ideas into a structured, production-ready "Spec Bundle."
This detailed guide will walk you through setting up your first project, providing context, navigating the AI interview, and reviewing your finalized specifications.
🚀 Why Use MySpec? (The Spec-Driven Methodology)
Before diving in, it helps to understand how MySpec changes your workflow. We utilize Spec-Driven Development (SDD).
Instead of jumping straight into an IDE with a vague prompt, MySpec helps you generate a standardized set of markdown files. By the time you open your AI coding assistant, you don't have to ask it to think of an architecture - you only have to ask it to execute a crystal-clear blueprint.
Better specs make development easier and even more: they make great products possible.
Step 1 | Join the Open Beta & Create Your Account

Getting started is quick, simple, and currently available to all developers in our Open Beta.
- Navigate to myspec.dev.
- Sign in securely using your Google account or preferred email address.
- You will immediately be dropped into your MySpec workspace, ready to build.
Step 2 | Set Up Your Project & Upload Context
The foundation of a great specification is great context.
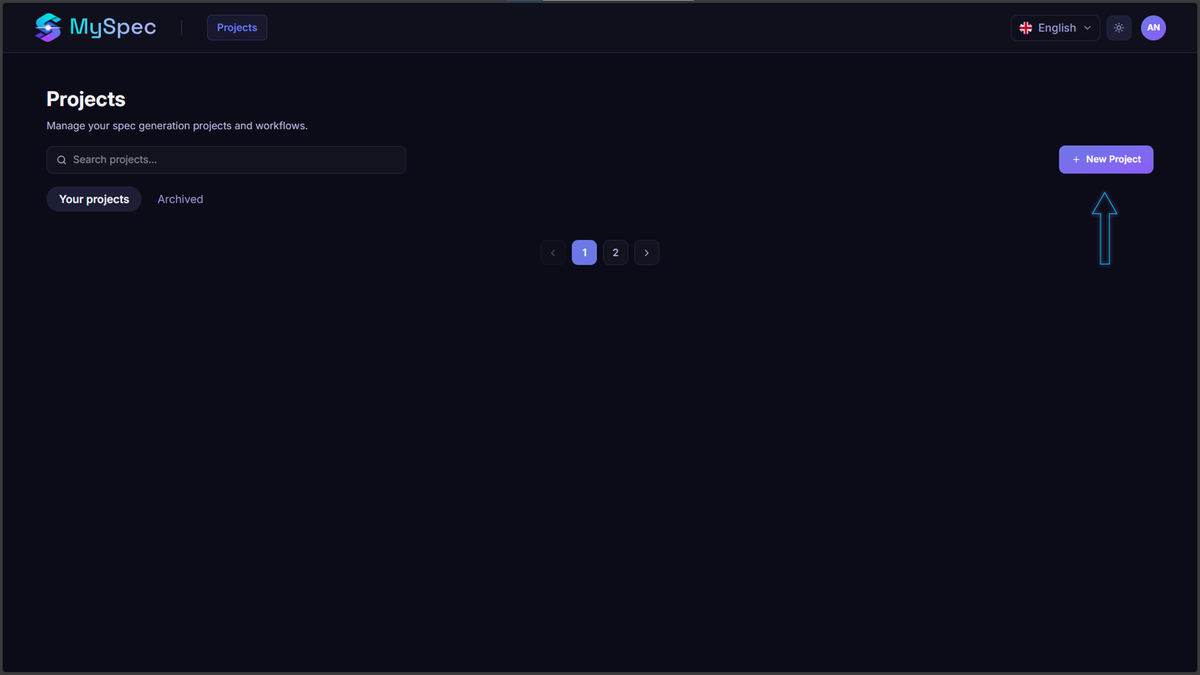
- Create a New Project: Click the "New Project" button. A clean modal will appear asking for a Project Name (e.g., Mobile App Spec, Blog Platform) and a Description.
- Describe Your Vision: Keep the initial description simple. Example: "A blog to share traveling tips and sell trekking clothes."
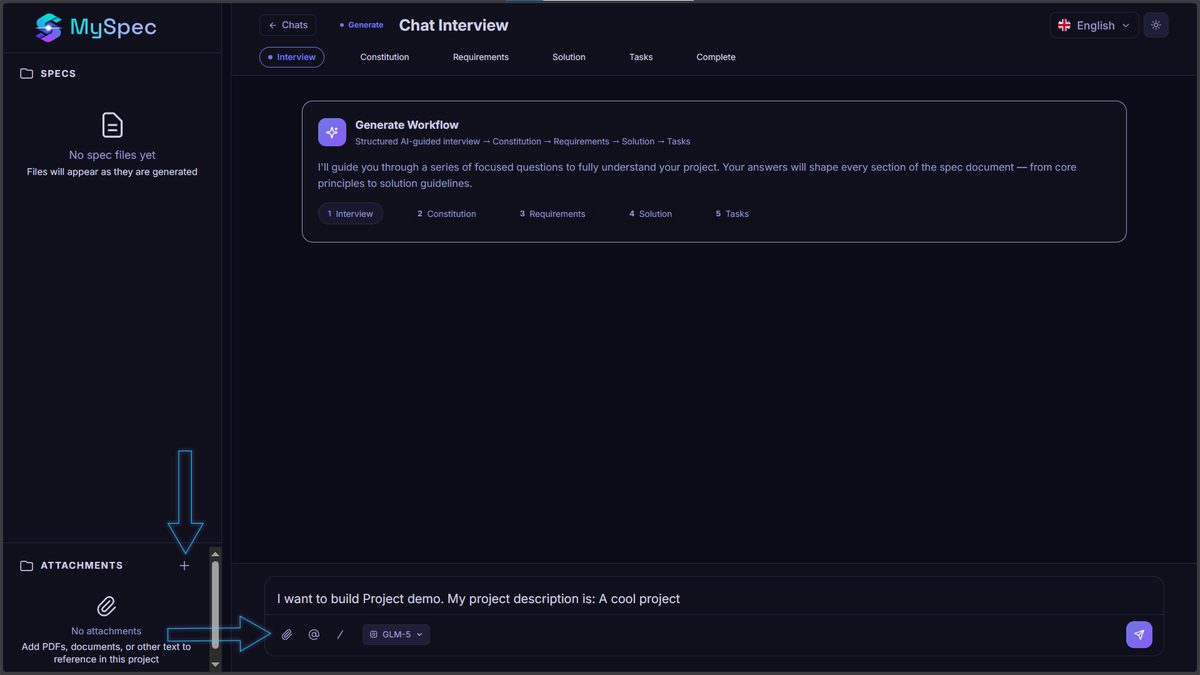
- Upload Attachments (Crucial for Context): Look at the bottom left of your dashboard. You will see an Attachments panel.
- Pro Tip: If you have existing brain-dumps, rough PRDs, database schemas, or API docs in PDF, DOCX, or TXT format, upload them here! The AI Architect will read these files and incorporate your existing knowledge into the new specifications.
Step 3 | The AI Architect Interview
You don't need a massive, perfect prompt to start. MySpec features an AI-driven Interview Engine that will guide you.
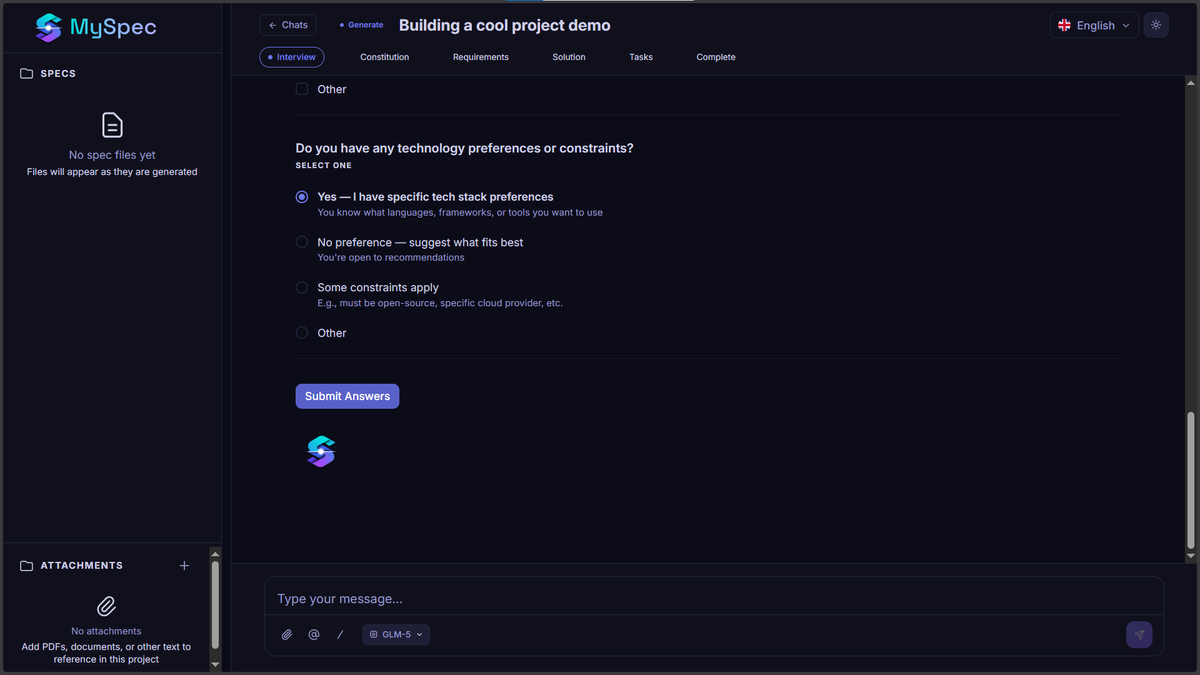
Notice the top navigation bar tracking your progress: Interview ➔ Constitution ➔ Requirements ➔ Design ➔ Tasks.
- Answer the Questions: Based on your initial description and uploaded attachments, the AI will ask targeted, clarifying questions. (e.g., "Should this be mobile-first?" "Do you need offline capability?" "What's your preferred payment gateway for the clothes?")
- Chat Naturally: Reply in the chat box just as you would to a senior developer.
- Skip if Unsure: Don't have an answer? Tell the AI you aren't sure, and it will provide smart, industry-standard recommendations for you to choose from.
Step 4 | Watch Your Spec Bundle Generate
Once the interview is complete, MySpec automatically shifts into the generation phase. You can watch your files build in real-time in the left-hand Specs Sidebar.
MySpec generates four critical, standardized markdown files:
- 📄 constitution.md (The Foundation): Defines your tech stack, architectural patterns (e.g., Clean Architecture), and non-negotiable coding standards.
- 📄 requirements.md (The "What"): Details functional specifications and user stories using the strict EARS+ (Easy Approach to Requirements Syntax) format.
- 📄 design.md (The "How"): Your technical blueprint, complete with database schemas, API endpoints, and auto-generated Mermaid.js architecture diagrams.
- 📄 tasks.md (The "Action"): A granular, step-by-step implementation plan perfectly scoped for AI coding agents to execute.
Step 5 | The Review & "Vibe Specify'ing" Process
MySpec doesn't just hand you a document and wish you luck. The Review phase is where the magic happens.
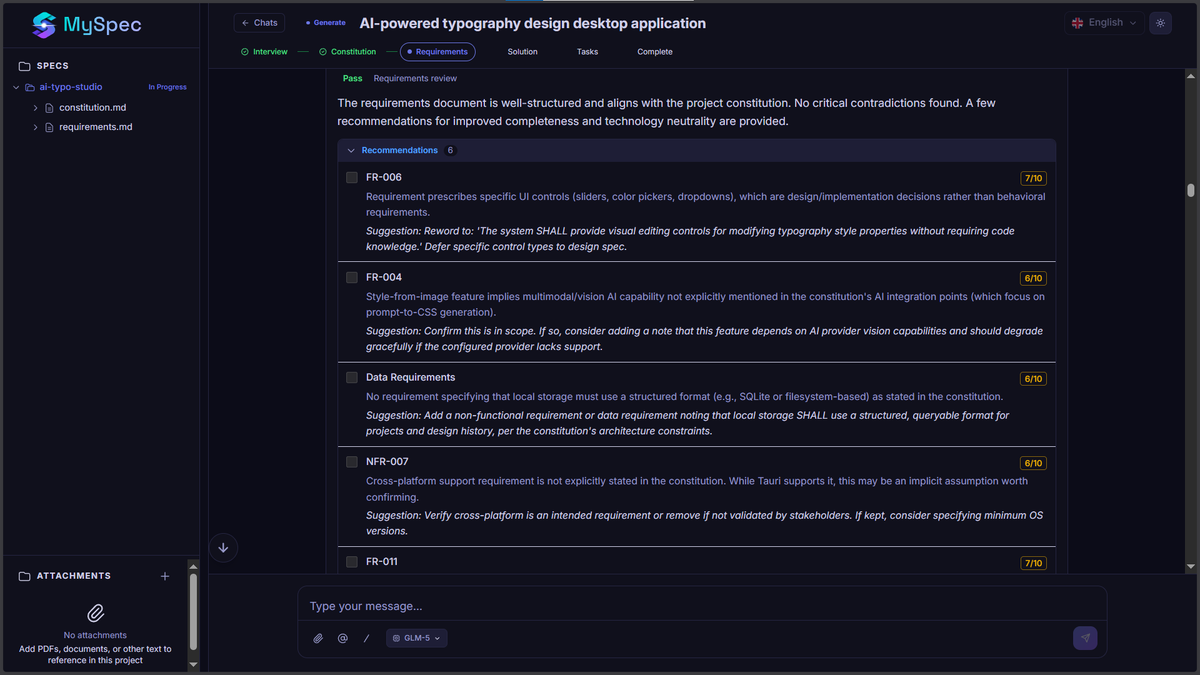
Navigating the Review UI
As seen in your dashboard, MySpec will present specific requirements and architectural choices for your approval.
- AI Quality Scoring: The AI acts as its own QA, scoring its generated requirements (e.g., giving a requirement a 6/10 or 5/10) and highlighting why it might be tautological or unclear.
- Actionable Suggestions: The AI will offer inline suggestions (e.g., "Clarify whether in-app guidance counts as 'unassisted'.")
- Approve or Reject: Use the Next to approve, or hit Request Change to modify the rule.
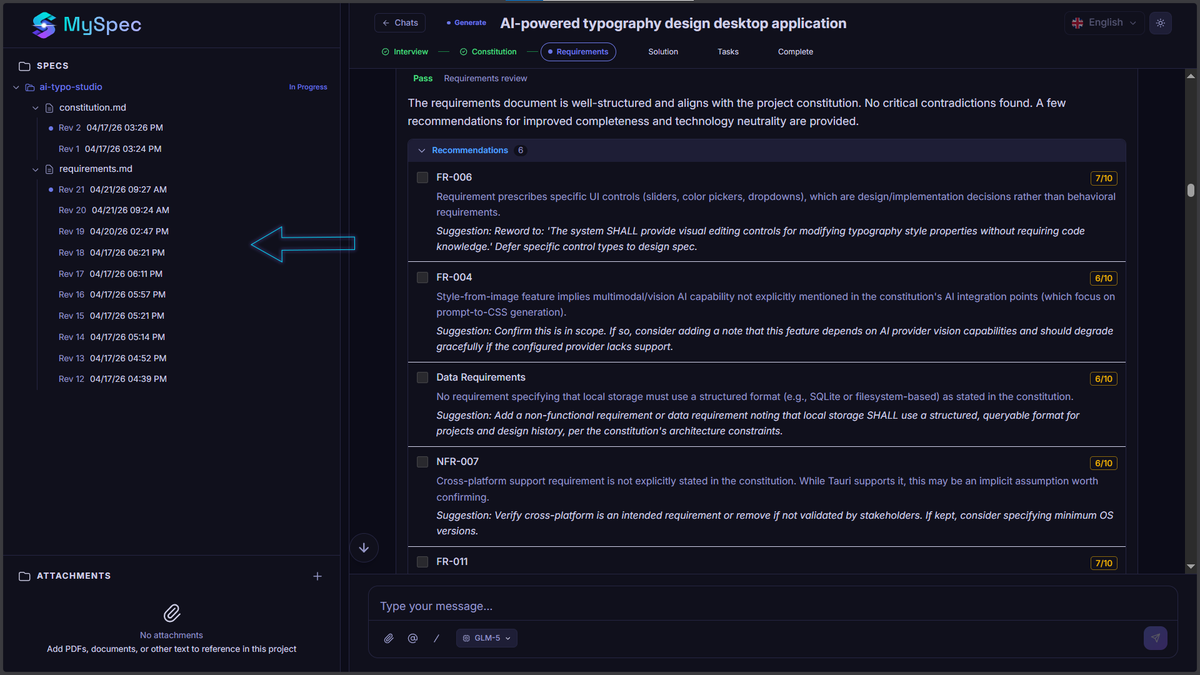
Vibe Specify'ing (Chat-to-Edit)
Notice something missing in your generated design.md? Don't edit the markdown manually. Use Vibe Specify'ing.
- Go to the chat bar at the bottom.
- Type a natural language command: "Make the API more secure by adding rate limiting."
- The AI will directly update the necessary files.
- Version Control: Look at the left sidebar. MySpec tracks every single file revision (e.g., Rev 18, Rev 17). If you don't like an AI update, you can instantly roll back to a previous version.
Step 6 | Export and Build with AI
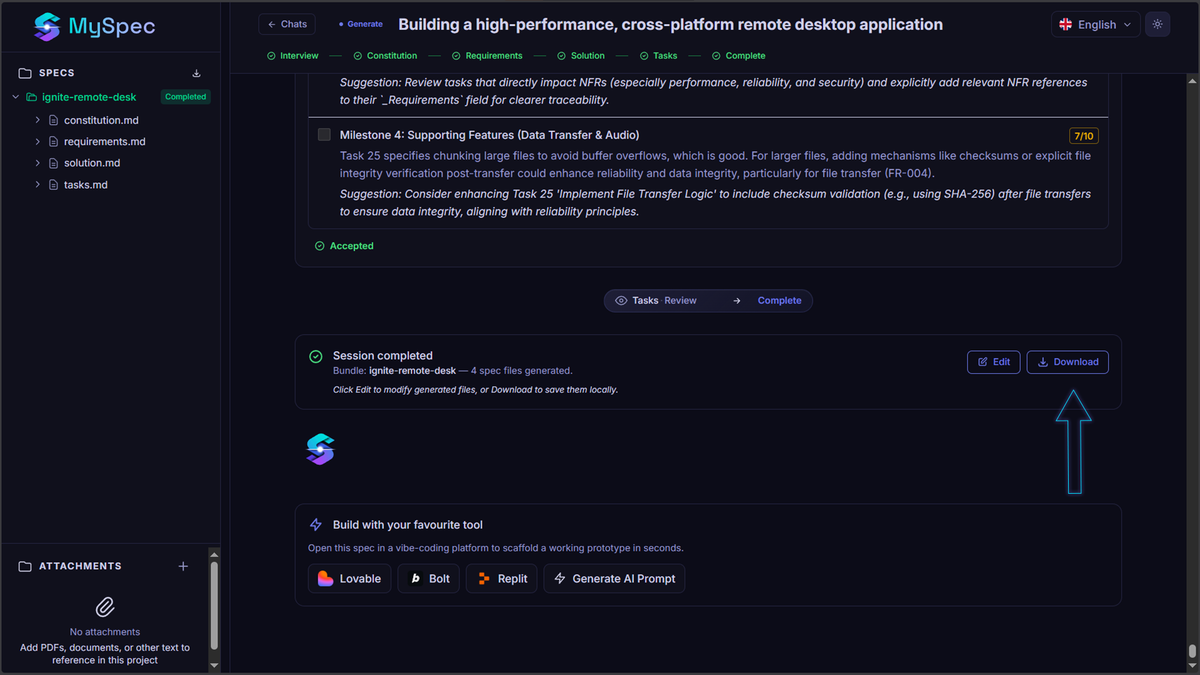
Once your specs are perfectly refined, it’s time to code.
- Export the Bundle: Download your Spec Bundle as a ZIP file.
- Add to Your Repo: Place the exported markdown files into a .specs/ directory at the root of your code repository.
- Prompt Your AI Assistant: Open your IDE (Cursor, VS Code with Copilot, etc.) or Claude Code, and use a simple prompt:"Read the files in the .specs/ folder. Please implement the authentication module exactly as described in tasks.md, following the rules in constitution.md."
Watch as your AI coding tool builds the right thing, the first time, with drastically reduced hallucinations and zero token waste.
Need Help?
👉 Checkout our other blog posts to learn about spec-driven development here.
Because MySpec is currently in Open Beta, your feedback is incredibly valuable to us! If you encounter bugs, or have feature requests (like custom spec templates or team collaboration tools coming later this year), reach out to our team via the app.
Happy Specifying! 🚀